183,92 €
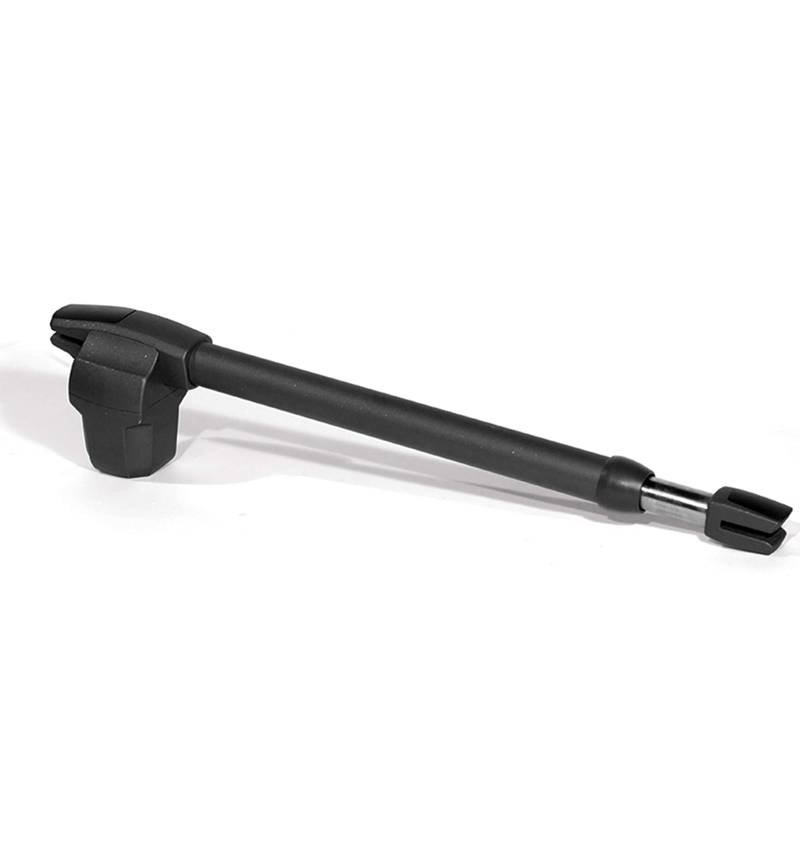
The Motorline Lynx is an electromechanical engine for automation of swingle, designed to offer reliable, powerful and safe operation both in residential installations and in moderate intensive access accesses. It is a robust and versatile solution, available in Versions of 230V AC and 24V DC, as well as in different stem tours to adapt to the needs of each sheet and geometry installation.
The engine is available with Stem of 300 mm, 400 mm and 600 mm, allowing you to select the most appropriate race depending on the type of door, available space and the required opening angle. According to the chosen version, the Motorline Lynx can automate sheets up 2500 mm, 3000 mm or 4000 mm maximum length, keeping a 2300 N push force.

We ship your order within 24/72 hours

Secure payment: Card, Bank transfer, Bizum
 Fast shipping from Spain
Except bulky
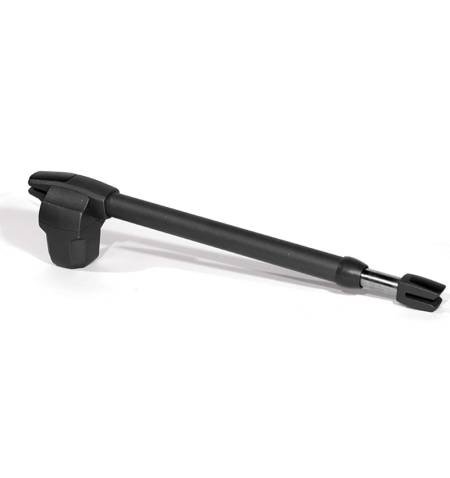
The Motorline LYNX is an electromechanical engine for automation of swingle, designed to offer reliable, powerful and safe operation both in residential installations and in moderate intensive access accesses. It is a robust and versatile solution, available in versions of 230V AC and 24V DC, as well as in different stem tours to adapt to the needs of each sheet and geometry installation
In this product it is marketed Only the Lynx engine, that is, without maneuver box, without receiver and without remote controls. This makes it an ideal option for substitutions, replenishments, existing installation extensions or projects in which the professional already has compatible control electronics.
The engine is available with stem of 300 mm, 400 mm and 600 mm, allowing you to select the most appropriate race depending on the type of door, available space and the required opening angle. According to the chosen version, the Motorline Lynx can automate sheets up 2500 mm, 3000 mm or 4000 mm maximum length, keeping a 2300 N push force.
One of the strengths of the Lynce range is your great flexibility assembly. The manual indicates that the engine has been developed for swing doors and that incorporates the possibility of change engine orientation, allowing to transform a right side motor on the left side. This feature is especially useful for installers and technical services, as it facilitates automation adaptation to different door configurations without having to resort to totally different references.
The Motorline Lince offers a prepared construction to work outdoors, with degree of protection IP54 and a range of operating temperature of -25 ºC at 65 ºC. In addition, it incorporates thermal protection at 120 ºC, which helps preserve the engine against overwhelming or demanding work conditions. These features make it an adequate alternative for swing gates installed in homes, communities or private accesses where a durable and resistant automation is needed.
In terms of benefits, versions of 230v develop a power of 230 W and an approximate opening speed of 20 mm / sec, while the versions of 24v work with 60 W and reach an approximate speed of 23.5 mm / sec. The manual also specifies a working frequency of the 25% in 230V and from 55% in 24V, being the latter especially interesting for installations where a greater maneuver capacity or more frequent use is looked for.
Depending on the selected race, the opening time varies approximately between 8 and 13 seconds in the 300 mm version, between 13 and 18 seconds in the 400 mm and between 20 and 28 seconds in the 600 mm. This allows you to choose the most suitable model not only by the length of the stem, but also by the maneuver and the expected behavior of the installation.
Another important feature of Motorline Lynx is your manual unlocking system by key, designed for emergency situations or power failure. This unlocking allows you to uncouple the automation to maneuver the door manually when necessary, an essential function in any professional swing door installation.
The manufacturer also insists on the importance of a correct installation, respecting the dimensions x, y and w, as well as the height of the supports, to guarantee the durability of the motor and a fluid movement of the door. In the same way, the use of mechanical stops in opening and closing, as they help avoid undue efforts on automatism and improve the general functioning of the installation.
If you are looking for a reliable linear actuator for your gambling cancel, the Motorline LYNX it is an excellent option for its balance between power, robustness, availability in various tensions and tours, and ease of adaptation to multiple configurations. Is a solution especially recommended for sector professionals who need a replacement engine o A linear quality automation to integrate with an existing compatible center
| Lince300 | Lince400 | Lince600 | ||
| Feed | 230vac | 230VAC 50 / 60Hz | 230VAC 50 / 60Hz | 230VAC 50 / 60Hz |
| 110vac | 110VAC 50 / 60Hz | 110VAC 50 / 60Hz | 110VAC 50 / 60Hz | |
| 24vdc | 24vdc | 24vdc | 24vdc | |
| Power | 230/110 VAC | 180w | 180w | 180w |
| 24vdc | 60w | 60w | 60w | |
| RPM | 230/110 VAC | 1400 rpm | 1400 rpm | 1400 rpm |
| 24vdc | 1600 rpm | 1600 rpm | 1600 rpm | |
| Noise | LPA ≤ 50db (A) | LPA ≤ 50db (A) | LPA ≤ 50db (A) | |
| Strength | 2300n | 2300n | 2300n | |
| Operating temperature | -25ºC ~ 55ºC | -25ºC ~ 55ºC | -25ºC ~ 55ºC | |
| Thermal protection | 120 ° C | 120 ° C | 120 ° C | |
| Level of protection | Ip54 | Ip54 | Ip54 | |
| Labor | 230/110 VAC | 25% | 26% | 25% |
| 24vdc | Intensive | Intensive | Intensive | |
| Maximum course | 300mm | 400mm | 600mm | |
| Leaf maximum leaf | 2500mm | 3000mm | 4000mm | |
| Capacitor | 230vac | 8μf | 8μf | 8μf |
| 110vac | 20μf | 20μf | 20μf |

Note: to know if it is right or left side we will have to see the engine from inside the door.


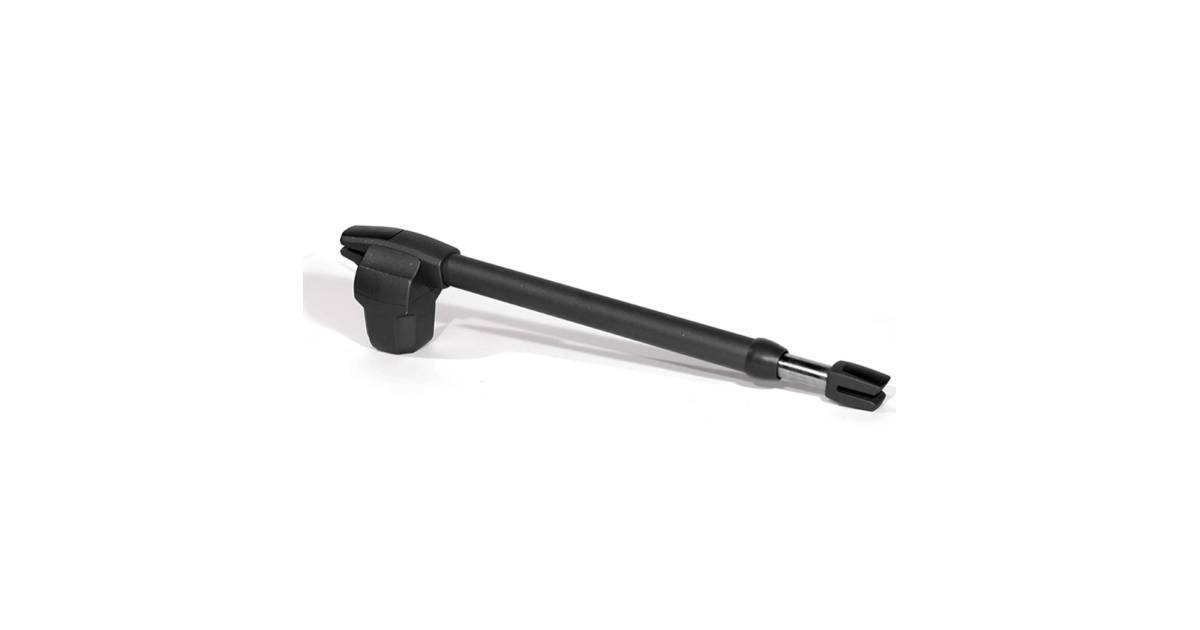
The Motorline Lynx is an electromechanical engine for automation of swingle, designed to offer reliable, powerful and safe operation both in residential installations and in moderate intensive access accesses. It is a robust and versatile solution, available in Versions of 230V AC and 24V DC, as well as in different stem tours to adapt to the needs of each sheet and geometry installation.
The engine is available with Stem of 300 mm, 400 mm and 600 mm, allowing you to select the most appropriate race depending on the type of door, available space and the required opening angle. According to the chosen version, the Motorline Lynx can automate sheets up 2500 mm, 3000 mm or 4000 mm maximum length, keeping a 2300 N push force.
Fast shipping
from Spain
We have the best brands
in garage automation systems
Bank transfer, credit/debit card, Bizum
We advise you before and after
to place your order